
How to Paint 3D Prints in 2026 (7 Easy Steps for Beginners)
3D printing allows creators to turn digital models into real objects, but raw prints often look rough or unfinished. Painting a 3D print is one of the easiest ways to improve its appearance and make the model look professional.
Whether you are printing miniatures, prototypes, or cosplay props, learning how to paint 3D prints properly can make a huge difference. With the right tools and preparation, even beginners can achieve smooth and detailed results. In this guide, you’ll learn simple steps to paint 3D prints, the best materials to use, and tips for getting a professional finish.
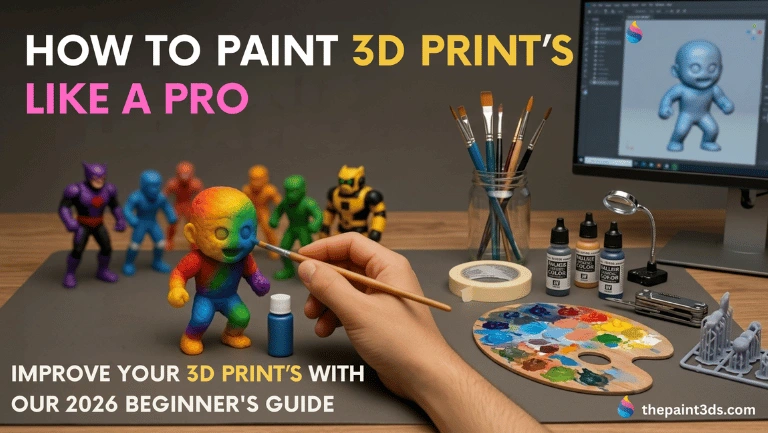
Can You Paint 3D Prints?
Yes, most 3D printed objects can be painted. Materials like PLA, ABS, and resin accept paint well after proper surface preparation. Many creators design their models using software like Paint 3D, Blender, or Tinkercad before exporting the files for printing.
If you want to understand how Paint 3D compares with classic drawing software, you can read our guide on MS Paint vs Paint 3D to see which tool works better for creating and editing simple 3D designs.
Painting is especially popular for:
Which type of tools and Materials Needed ?
Before starting, gather the basic tools used by most 3D printing hobbyists.
Common materials include:
Many beginners prefer acrylic paints from brands like Vallejo or Citadel because they dry quickly and are easy to apply.
Preparing Your 3D Print Before Painting
Preparation is the most important step when painting a 3D model. Most FDM prints have visible layer lines, so smoothing the surface improves the final result.
Remove Support Material
After printing, remove any support structures carefully. Use small cutters or hobby knives to avoid damaging the model.
Sand the Surface
Light sanding helps smooth out layer lines. Start with lower grit sandpaper and move to finer grit for a smoother finish.
Clean the Model
Dust or oil from your hands can prevent paint from sticking. Clean the model with a soft brush or a slightly damp cloth.
Apply Primer
Primer creates a better surface for paint and highlights small imperfections. Spray primer evenly and let it dry completely before painting.
Step-by-Step Process to Paint 3D Prints
Follow these simple steps to paint your model.
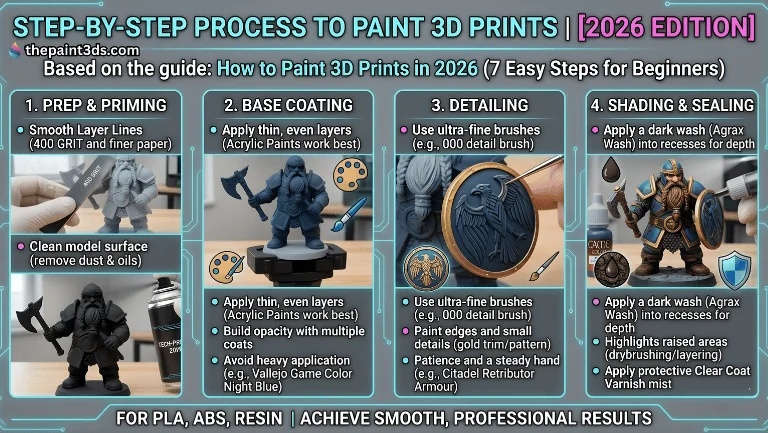
1. Prep & Priming
Start by preparing the 3D print surface. Smooth visible layer lines using 400-grit sandpaper or finer. After sanding, clean the model to remove dust, oils, or debris. Proper preparation ensures the paint sticks well to the surface.
2. Base Coating
Apply thin and even layers of acrylic paint as the base coat. Acrylic paints work best for beginners and provide good coverage. Build the color gradually with multiple thin coats rather than applying one thick layer.
3. Detailing
Use ultra-fine brushes (such as a 00 detail brush) to paint small areas and intricate parts of the model. Carefully paint edges, patterns, and decorative elements. This step requires patience and steady hands for precise results.
4. Shading & Sealing
Apply a dark wash to recessed areas to create depth and shadows. This technique helps highlight details on the model. After shading, apply a light protective clear coat varnish to protect the paint.
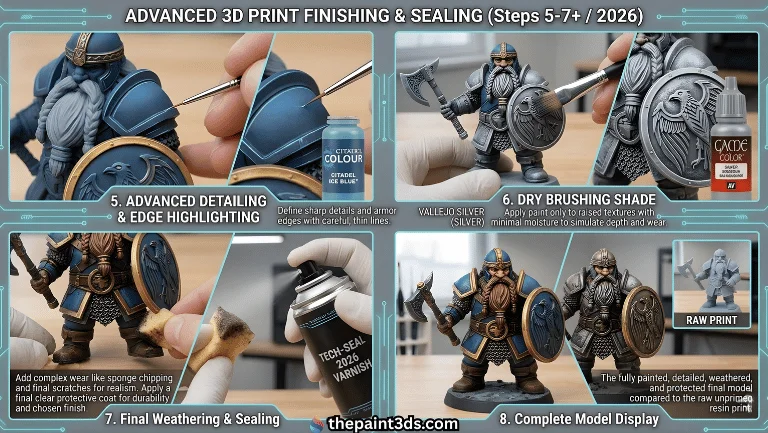
5. Advanced Detailing & Edge Highlighting
Add sharp details and highlight the edges of the model to make the design stand out. Use a fine brush and carefully apply lighter paint along armor edges and raised areas. This technique improves depth and makes the 3D print look more realistic.
6. Dry Brushing Shade
Dry brushing helps emphasize textures on the model. Lightly dip a brush into paint and remove most of the moisture before applying it to raised surfaces. This method creates subtle highlights and adds depth, giving the model a more natural and worn appearance.
7. Final Weathering & Sealing
To create a realistic look, add weathering effects such as sponge chipping or small scratches. After finishing the paint details, apply a clear protective coat or varnish to seal the paint and protect the model from damage.
8. Complete Model Display
After sealing and drying, the model is ready for display. The final painted version should show improved texture, color depth, and details compared to the original raw 3D print.
Best Paint Types for 3D Prints
Different types of paint can be used depending on the project.
Acrylic Paint
The most common option for beginners. It dries quickly and is easy to clean.
Spray Paint
Great for large surfaces and smooth base coats
Enamel Paint
Provides a durable finish but requires longer drying time.
Most hobbyists start with acrylic paints because they are easier to control and safer to use indoors.
Common Mistakes When Painting 3D Prints
Beginners often make a few simple mistakes that affect the final result.
Common problems include:
Taking time during preparation usually leads to much better results.
Tips for Professional-Looking Results
If you want your 3D prints to look more realistic, follow these simple tips:
Planning your colors in design tools like Paint 3D before printing can also help you decide how the final painted model should look
Conclusion
Painting 3D prints is a simple process that can dramatically improve the look of your models. By sanding the surface, applying primer, and using thin layers of paint, even beginners can achieve professional results. If you want to explore more design options, you can also try some best free online 3D tools that work as alternatives to Paint 3D for creating models before printing.
With the right preparation and tools, your 3D printed objects can go from rough plastic prints to detailed and colorful creations. As 3D printing continues to grow in popularity in 2026, learning finishing techniques like painting will help creators produce higher-quality and more realistic models.
Hahahaha You are so good